Showing posts with label cauliflower. Show all posts

Thursday, June 5, 2014

Cauliflower Fried Rice with Spring Veggies and Chives


Weekday dinner just got exciting in a big way. If you like Chinese food you are going to love this healthy version of Fried Rice. It has all of the yummy components of traditional Fried Rice minus the rice. 


Rice is most likely a pantry staple in most homes used as a starchy side next to or with veggies and meat of some sort or as a 'filler' for a vegetarian meal. Debatably, rice, especially processed white rice really isn't a healthy food to eat and has several downfalls to it's few qualities. For instance, and I'll keep it super short so I don't bore you (more than I already am?) white rice has been waaaay over processed and completely stripped of any nutritional value, enough so that the FDA requires that it be "enriched" or "fortified" with vitamins and minerals.

Brown rice while a healthier option for it's vitamin content and fiber still has a few concerning negative qualities so I eat it vary rarely if at all any more.  Why?  Brown rice is very good at naturally 'leeching' non organic arsenic, found in pesticides and insecticides from the soil and water and is absorbed by rice as it grows. The inorganic form of arsenic, a toxin known to cause liver, lung, kidney and bladder cancer. I found this out when I tried substituting brown rice syrup for sugar several years ago and did some research. A lot of research. 


All rice, grains and nuts have large amounts of phytic acid in them. 
Phytic acid, the storage form of phosphorus,  is one of those pesky “anti-nutrients” the Paleo community keeps telling you to avoid. It’s often considered an anti-nutrient because it  binds minerals in the digestive tract, making them less available to our bodies. 

The process that produces brown rice removes only the outermost layer, the hull, of the rice kernel and is the least damaging to its nutritional value. The complete milling and polishing that converts brown rice into white rice destroys 67% of the vitamin B3, 80% of the vitamin B1, 90% of the vitamin B6, half of the manganese, half of the phosphorus, 60% of the iron, and all of the dietary fiber and essential fatty acids. Fully milled and polished white rice is required to be "enriched" with vitamins B1, B3 and iron. 


Buuttt......... 


White rice doesn't contain the phytate and trypsin inhibitor content of the less-milled brown rice and if you cook it properly (which neutralizes the haemagglutinin-lectin) you don’t have much to worry about as far as an anti-nutrient perspective. 

The debate goes on.... if you're interested in that sort of thing. 


Listen, eating rice is not going to kill you, quickly...... just kidding. However, I for one have decided that it's pretty much a super bland, super starchy (yeah, your body does need some starch to survive but there's starch in healthier foods out there) not so healthy food/filler to eat therefore, not worth it. 

Decide for yourself, I'm no expert. 


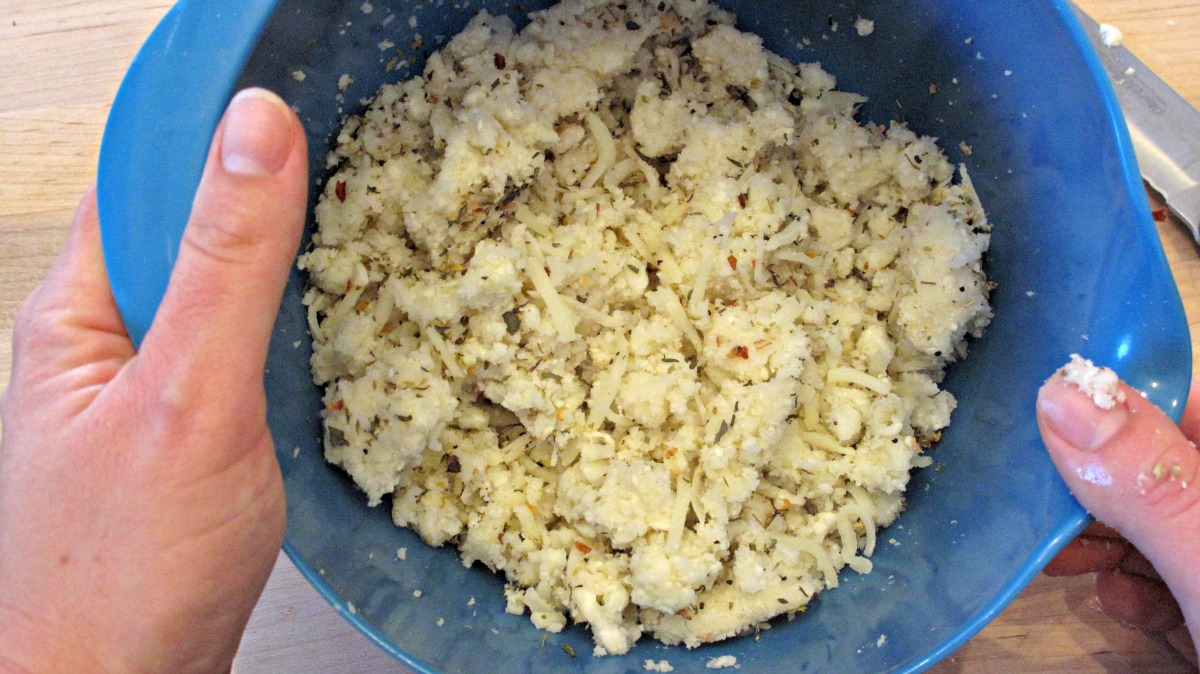
What I DO know for a fact is that eating more vegetables is a good thing. I for one can not get enough of them. Cauliflower is one of my favorite veggies although if you told me I would say that when I was 10 I would have thought you were craze-E! I've been using cauliflower in lots of dishes like these Chipotle Cheddar Poppers,  Buffalo Cauliflower 'wings' and even as a healthy, gluten free pizza crust!


It's really hard to tell that this is not rice, especially with a little bit of Tamari sprinkled on top but you can taste cauliflower so if your a hater this dish might not be for you. However, my kids never raised a skeptical eyebrow and happily gobbled this Cauliflower Fried Rice up.


TIME     30 MINUTES        SERVES    6


1 medium head of cauliflower, leaves removed and chopped

1 cup mixed frozen vegetables, rinsed and drained
1 small red bell pepper, diced into small pieces
2 tablespoons + 1 teaspoon sesame oil (for frying the cauliflower and egg)
4 large Organic, free range brown eggs, whisked

Fresh chives, chopped


Heat a large skillet over medium-high heat. 

In a large food processor or powerful blender, place half of the cauliflower florets. Pulse several times until you have a rice like consistency. Be careful not to over process or you will have mush! Scoop cauliflower 'rice' into a bowl and set aside. Do this to the remaining cauliflower. 

Pour sesame oil (not the toasted kind) into the hot skillet. Dump the cauliflower carefully into the skillet and spread it out evenly over the pan tossing to cover with the oil. Let it sit for a few minutes to brown and release some moisture. Add the red bell pepper toss once or twice and let it continue to 'fry'.  

Add the rinsed and drained veggies, stir to combine. 

Meanwhile,  heat a non stick pan over medium-high heat. Add sesame oil (not toasted) to pan and swirl to coat. Pour in the eggs. Using a silicone spatula push the eggs towards the center of the pan working your way around. Let them sit for 1 minute then repeat, pushing them towards the center of the pan working your way around. Do not overcook the eggs! You want them to be undercooked and slightly runny.  

Add the toasted sesame oil to the cauliflower, store to combine. Pour the eggs into the cauliflower and quickly fold them into the mixture cooking just 1-2 minutes more until eggs are just done. Remove from heat, serve in bowls piping hot. Garnish with tamari and chives.


resources 

Tuesday, March 11, 2014

Roasted Cauliflower Florets with Sweet Curried Quinoa


Can we just talk for a minute about how hard it is to motivate myself to get anything at all done right now? Honestly, all I want to do is be outside and soak up the warm, perfect Arizona sun in all of its perfect glory. I realize most of the Country is struggling through a nasty winter at the moment and I'm sorry to rub it in your face, I don't mean to. I'm more than grateful for the gorgeous weather we have here in Phoenix and I mean to take advantage of  every single second of the sun basking, pool side lounging, Chardonnay sipping Spring we have been blessed with. Feel free to come visit us anytime (except June-August which pretty much sucks and it's your turn for bragging).


We've been either eating out (on patios of course), ordering in or making super simple, throw together lunches and dinners so as not to waste any time stuffed up indoors. I've come to terms with my laziness and in fact prefer to call it embracing and enjoying the present. Perspective people.


Make this when you are craving something simple, sweet and savory all at the same time. Don't forget the raisins, Yum! The end. 


recipe source  Cookie and Kate

SERVES     4        PREP TIME    10        COOK TIME    30


Roasted Cauliflower


1 head cauliflower, cut into bite-sized florets
2 tablespoons melted coconut oil or olive oil
¼ teaspoon cayenne pepper
pinch sea salt


Curried Quinoa and Greens


2 teaspoons melted coconut oil or olive oil
1 medium yellow onion, chopped
1 teaspoon ground ginger
1 teaspoon ground turmeric
½ teaspoon curry powder of choice (optional)
½ teaspoon ground cardamom
1 can (14 ounces) light coconut milk
½ cup water
1 cup quinoa, rinsed well in a fine mesh colander
⅓ cup raisins
1 teaspoon sea salt
1 tablespoon cider vinegar
4 cups baby spinach, baby kale, chard or arugula


 red pepper flakes to taste


Roast the cauliflower: 

Preheat oven to 425 degrees Fahrenheit. Toss the cauliflower florets with oil, cayenne p and a light sprinkle of sea salt. Roast for 25 to 30 minutes on the middle rack, turning halfway, until the cauliflower is tender and golden on the edges.

Cook the quinoa:

In a large pot warm the oil over medium heat. Add the onion and cook until translucent, stirring frequently, 3- 5 minutes. Add the ginger, turmeric, curry powder and cardamom and stir until fragrant, about 30 seconds. Pour in the coconut milk, water, rinsed quinoa and raisins. Bring the mixture to a soft boil, then cover and reduce heat to a simmer. Cook for 15 minutes, then remove the pot from heat and let it rest for 5 minutes.

Fluff the quinoa with a fork. Stir in the salt, vinegar and greens. Spoon quinoa into bowls over roasted cauliflower. Add red pepper flakes to your taste.


Thursday, August 1, 2013

Cheesy Cauliflower Crust Pizza with Prosciutto and Roasted Garlic {gluten free}


It takes a good, solid year to get moved and settled into a new house. This, is a fact.... otherwise known as my opinion. We have been living in our current house AKA the crappy rental for almost a year and I finally found a good place to store the ginormous magnifying glass from Pottery Barn and hung the last 3 pictures in our bedroom. Mind you I have absolutely no idea where half of my belongings are. You see, part of the curse of being a procrastinator is that you wait until the day of moving to pack things that you never knew you even had in the first place. Things you never even used one single time like your kitchen scale which you have now decided that you can't live without. 


Not worth killing yourself over a kitchen scale by climbing mountains of haphazardly stacked boxes topped with over sized Christmas wreaths and luggage. The arrangement my husband assured me was only temporary 10 months ago.


What is driving me batty is not remembering exactly what camping gear we do or do not have because when we lived in our old house we had 4 children, 3 of them under the age of 7 and 1 in diapers until after we moved. Not exactly the scenario I would paint for a fun camping trip. Wait. Did I just say camping could be fun? Well, we're going this weekend and have no idea where half our gear is. 


Camping with 4 kids = Not always so much fun.

Simple home made pizza with negative zero guilt = My idea of fun!


Amen!


Believe me when I tell you that this pizza crust is delicious, thin and remarkable crispy yet slightly soft and chewy with notes of Italian herbs, spices and freshly grated Parmesan and mozzarella in every bite.


Your "dough" will be slightly crumbly but will hold together nicely
by the egg and cheeses. 


Mix the 'dough' together with your hands until combined then shape into a ball and place on a square of parchment paper. Using your hands, flatten out into a circle about 1/4" thick. The thicker you make it the longer it will take to cook. Look how nicely it forms.


While you are preparing the cauliflower 'dough' place a pizza stone (or baking sheet)  in an oven pre-heated to 450F. on the lower rack.

Carefully slide the dough and parchment onto the pre-heated stone.
Bake 20-25 minutes until the crust is golden brown and crispy around the edges.


Remove stone from oven, place on a cooling rack and top with your choice of toppings! The possibilities are endless of course. I used one of my all time favorite combos, roasted garlic and prosciutto with fresh pizza sauce and lots of fresh Italian cheeses. I made the boys a cheeseburger pizza. 


You Will Need:

1 medium sized cauliflower
 1/4 cup mozzarella or Italian cheese blend plus more for topping if desired
1/4 cup Parmesan Cheese, freshly grated is best
1 jar prepared pizza sauce or home made (recipe below)
1 medium egg (Organic & free range of course :)
1/2 tablespoon dried oregano
1 teaspoon dried basil
1/2 teaspoon dried thyme
1 teaspoon garlic powder
1/2 teaspoon salt
cracked black pepper or red pepper flakes to taste (I use 1/2 teaspoon red pepper flakes)

Toppings of your desire.


Wash cauliflower well and dry. Cut off leaves and stems. Break into florets. 

Place into a large food processor (I don't have one, I used my Vitamix. If you do this I suggest putting in half at a time.)  PULSE several times until you have a 'powdery' texture. Don't over blend, you'll have mush.

Scrape into a microwave safe bowl. Microwave for 2 minutes on regular power. (I've skipped this
step before and it turned out fine, slightly soggier but fine)
Carefully remove from microwave and let sit for a couple of minutes. 
Dump cauliflower onto the middle of a kitchen towel and fold lengthwise into thirds. 
Now, wring the heck out of it getting out as much liquid as you possibly can. I typically get just less than a cup! The more liquid you get out, the crispier your crust will be i.e. more toppings!

Place cauliflower back into bowl. add herbs, spices, salt and cheeses. Mix well with your hands.
Now add egg. Mix to combine. Make into a ball and place onto a square of parchment paper. 
Using your hands, shape into a circle 1/4" thick. 

Carefully slide the parchment paper and cauliflower crust onto your pre-heated stone.
Bake at 450F for 20-25 minutes (checking after 15 minutes as oven times vary).
When crust is golden brown and crispy around the edges remove from oven.

Top with your favorite pizza toppings and pop back into the oven for 5-10 minutes until warmed through.


Enjoy!!!


Monday, November 5, 2012

Baked Cauliflower with Buffalo Sauce and Home Made Blu Cheese Dressing


I work in an place that is predominantly employed with women. It is a fast paced, usually high stress work environment that doesn't allow for mistakes or some one could die. This makes for a large group of women who are mostly type A personality. A group of women who get up every day ready to save lives, treat people who are sick or injured and give a lot of attention to detail for 8-12 hours straight. We do this while working along side other strong minded women and surgeons who expect nothing less than perfection and efficiency in as short of a time as safely possible.


I love my job. 


I am lucky to work part time right now and with a flexible schedule so I can spend a lot of time with my 3 young children. So when I go to work it's a little like spending time with a group of friends and catching up on each others lives. I think my favorite part of working in an surgery is that every day I get to work with several different people and do many different types of surgeries from total joint replacements and spinal fusions to urology and fertility. 


What's strange to me, working in a place with mostly women is that almost ALL of them are into football. Big time. More so in fact than most men I've ever known. Picture 7 nurses in the lounge Monday morning all fighting for the sports page and talking stats and irate over the referee's bad call the night before. Picture news paper clipings of football articles taped up in the women's locker room. These women can carry on a conversation with the male surgeons about football as easily as my friends and I do about recipes and everyday happenings. Weird.

I learned early on when I started working at my current hospital 3 years ago not to mention the fact that I wasn't a football fan. That is an unforgiveable sin as far as my co-workers are concerned. 

While I'm not a big football fan ( shhhhhhhhhhh.......)    I do like football food. Hot wings, chips and dip, 7 layer bean dips and brats with saurkraut.  Mmmmmm. 

Love the food, hate the calories and more importantly the way I feel after indulging. Hot wings are my weakness. I could eat a big pile of them covered in chunky blue cheese and lick the sauce of the plate afterwards with out a bat of the eye. 


When I discovered this much healthier version of hot wings, minus the wings I nearly jumped out of my chair. Now I didn't have to feel guilty about eating my beloved hot wings and could eat them when ever I craved them which is often. Sometimes before noon. Im not ashamed.


recipe source: Curvy Carrot


Servings: enough for at least 3-4 people 

Ingredients 
1 head cauliflower, cleaned and cut into bite-sized pieces 
1 cup buttermilk 
1 cup all-purpose flour 
2 teaspoons garlic salt 
1 cup buffalo sauce 
1 tablespoon unsalted butter, melted


Instructions 
1. Preheat the oven to 450 degrees. 
2.  In a large bowl, whisk together the buttermilk, flour, and garlic salt, whisking until mostly smooth (it’s ok if there are a few lumps left). 
3. Very gently (cauliflower can be pretty delicate), place the cauliflower in the bowl and lightly toss to completely coat with the buttermilk mixture. 
4. Place the cauliflower in a shallow baking dish and bake for about 15-18 minutes or so (watch it, it may start to brown up quickly on you.) 
5. Meanwhile, combine the buffalo sauce and the melted butter in a small bowl. 
6. Carefully remove the hot cauliflower from the oven and pour the buffalo sauce mixture over it, stirring gently to coat it as best you can. 
7. Return the cauliflower to the oven and bake for another 5-8 minutes or so. Let cool slightly and serve immediately.


Recipe originally from PETA.    {Who knew Peta had vegetarian recipes?}


*see home made healthier blue cheese dressing below {my own recipe}


Enjoy!


Home made healthier Blue Cheese dressing:
  
TIME     5 MINUTES        YIELDS     1 /12 CUPS 
Ingredients:
  • 1/2 cup + 1/4 cup crumbled blue cheese
  • 1/2 cup Greek yogurt
  • 1/4 cup buttermilk
  • 1 tbsp lemon juice
  • 1 tbsp white wine vinegar
  • 1/8 teaspoon garlic powder
  • salt and freshly ground black pepper

Directions: 

In a small bowl, mash 1/2 cup blue cheese and yogurt together with a fork. Stir in lemon juice, vinegar,  garlic powder and salt and pepper until well blended. Top with more crumbled blue cheese. Makes a little more than 1 cup.


Wednesday, November 3, 2010

Gobi Chana Beans Subzi ~ Cauliflower, ChickPea and Bean Stir Fry


It all started with another beautiful dish from Anja's Thought for Food. Well, maybe it started before that with my introduction to real Indian food 9 years ago at a friends Sikh and Hindu wedding, but we won't get into that right now. Even though it's a really great story...


As I was saying, I found another wonderful recipe for 'Mustard Cauliflower' at Anja's site and knew I had to have it immediatly. As luck would have it, I had most all ingredients on hand already, save for fenugreek seeds, which I never did get. :(     Next time!


I decided to make this into a complete meal so the recipe below is mine. If you'd like Anja's recipe, I encourage you to head over to her wonderful site!
However, I Can Not for the life of me decide what to call this dish!
I NEED ANY AND ALL SUGGESTIONS, ESPECIALLY FROM ANYONE WHO KNOWS ANYTHING AT ALL ABOUT INDIAN CUISINE!


Update:
Thank You Swathi from Zesty South Indian Kitchen for coming up with a title for this dish!


If you like Indian food but don't think that making it yourself is an easy task, THINK AGAIN!
Really, most Indian food is created by using common spices that can be used in other cuisines as well.
Cumin, Corriander, Turmeric, Mustard seed, Cardamom, Chili powder and Curry just to name a few.

photo from Lovely India


Soooo, what to call my wonderful Indian dish? I scoured the Internet and can't come up with anything official. Most dishes are prepared as curries or with coconut milk.  I did however find some very interesting Indian cooking terminology.


Baghar (Tempering):
Bhunao (Saute/stir-fry):

mustard seeds ~ raai
cauliflower ~ phool gobi
salt ~ namak
green beans ~ flas beans
oil ~ tel
cumin ~ jeera
garlic ~ lahsun
 
For a complete terminology of common ingredients used in Indian cooking visit Indian Food Forever.


Without further ado, I present you with my very delicious, not overly spice, super easy,
No Name Indian Dish


You Will Need:
 
3 cups cauliflower florets (1 medium cauliflower)

1 cup fresh green beans

1 cup dry chick peas/garbanzo beans
2 teaspoons black mustard seeds ( did I mention all I had was mustard powder, it worked)

1/2 teaspoon fenugreek seeds ( use em if you got em )
1 teaspoon ground cumin

1/2 teaspoon turmeric

1/2 teaspoon ground chili

1/2 teaspoon salt

3 tablespoons peanut oil

3 garlic cloves, minced

2 tomatoes, chopped

1 cup chopped fresh cilantro leaves (divided)

1 tablespoon lemon juice, or to taste  ( I used lime )


Serves 2-4     *** I set aside some cauliflower, green beans and chick peas without spices for the littlest kids. I didn't want the drama of " It's to spiceeeeeee!"
 Mamma wanted Indian food and mamma gets what she wants!

-------------------------------------------------------------------


Putting it all together:

Cook garbanzo beans according to directions. I used my pressure cooker and it took 12 minutes. If you boil them I think it takes about 40 minutes. Fresh garbanzo beans taste so much better and honestly more authentic tasting than canned, not to mention wayyy cheaper!
Combine mustard seeds and fenugreek seeds in a small bowl. Set aside.

In another small bowl, combine cumin, turmeric, chili and salt. Keep all spices near the stove.

Heat oil in a deep pan until very hot. Add all seeds. When mustard seeds turn grey, reduce heat to medium and stir in ground spices. Cook for a few seconds, then stir in minced garlic and chopped tomatoes. Cook for about 2-3 minutes. Stir occasionally.

Add cauliflower florets and stir so it becomes coated with the spices mix. Cook for 3 minutes. Add 1/4 cup of water, green beans, cooked chick peas and 1/2 cup of chopped cilantro leaves. Cover pan with a lid and simmer until cauliflower is tender, about 5 minutes. Add more water, if needed.

Add lemon or lime juice and season with salt to taste. Garnish with remaining cilantro. Serve immediately.

Wednesday, October 13, 2010

Cauliflower-Yam Bisque


It's still in the high 90's here in Phoenix, but I can't wait any longer for my favorite Fall foods. Sometimes I really think I live in the wrong climate zone for my personality and wants. I have a closet full of cute boots and thick sweaters and jackets that I only get to wear once or twice a year. My attempts at gardening have been futile for the most part due to the heat and horrible rocky "soil". And I love soups, chili's and bisques. It's not quite as enjoyable eating chili when it's 98 degrees outside in October. Oh well, I'll get over my "grass is greener on the other side of the hill" attitude and move on.

Yesterday, it was ever so slightly cloudy out and so I jumped at the chance to make this Cauliflower-Yam bisque for lunch. The kids actually love this dish and so it makes it a bit more enjoyable to make. It's so super easy too, that's the name of the game here at Simply Healthy Family. I use my pressure cooker and simply tear the cauliflower into thirds along with the yam. I chop the yam in big chunks so they cook evenly. That's the beauty of a pressure cooker, I've never messed up anything! It locks in moisture which means no lost vitamins and minerals through the steam, that also means more flavorful tasting foods! It took 3 minutes to cook  a big head of cauliflower and 2 yams.


Thank you Deb at  kahakai kitchen and Tina at Mom's Crazy Kitchen for hosting such a fun idea. Every sunday is souper sundays and bloggers from all over the world get the chance to share their favorite soups, stews, chili's and anything else you can slurp with a spoon. My bisque is linked up on her website this week. Hop on over for plenty of warm, feel good recipes to get you through the Fall and Winter months.


Place a trivet in bottom of pressure cooker. Add 1 cup Organic chicken broth or water. I like the flavor and vitamins from broth. Add 1 head cauliflower and 2 yams. Turn stove on to high heat. Secure lid onto pressure cooker. Bring to 1st red ring, lower heat to lowest setting set timer for 3 minutes.
Bring pressure down naturally or by running water over lid.


Using an immersion blender on high, blend to combine cauliflower and yams.


In goes ze buttah.


 Add 1 cup almond milk OR half and half or heavy cream. Blend untill very smooth.


I add a tablespoon of Worcestershire sauce, sea salt, freshly cracked pepper medley 
and garnish with chives.


Bon Apetite!