Showing posts with label healthy. Show all posts

Friday, April 11, 2014

Super Power Breakfast Cookies #breakfastonthego


What's that? A cookie that gives you super powers? It's true, no need to disbelieve. We have been making these protein packed, whole grain cookies almost every very week for a few years now and they remain one of our favorite breakfast and afternoon snacks ever. They come together as quick as waffles or pancakes do and have everything you need to fuel your bod all morning, especially when you pair them with a piece of fresh fruit and a glass of milk!

I'm admittedly and unabashedly most definitely NOT a morning person! Even after 16 years of having a job that requires me to wake up at 5:30 am and even after having 4 children who require every ounce of energy that you don't have at 4 o'clock in the morning.


This means that a bowl of cold cereal would be served every. single. morning at our house during the week if it weren't for brainlessly easy fixes like these cookies. Everyone loves them and they keep me full until I'm able to have a late mid-morning snack at work. I'm happy knowing my kiddos are being fueled through their mornings of quizzes, science reports and P.E. classes. Win-Win.


Mmmmmmmmm, cookies.......... for breakfast.


Another reason I'm so hung up and head over heals for these cookies? They make a great "Grab and Go" afternoon snack. Perfect for those days when we are running all over town, day trips and hiking adventures. Again, we almost always pair a cookie (or two) with a piece of fresh fruit. A banana, apple, orange or grapes make great travel friendly snacks!


Toasted Whole Oats {Coach's Oats}


Super Power Breakfast Cookies

TIME     20 MINUTES        YIELDS     28-20 COOKIES


Ingredients

2 flax eggs (2 T flax meal + 1/4 c water)
1/2 c cooked pumpkin or applesauce or 2 medium ripe bananas (mashed)
1/2 c natural, no sugar added peanut butter (or other nut butter)
1/2 teaspoon baking powder 
1/2 teaspoon baking soda
Pinch sea salt
1 t pure vanilla extract 
1/4 c maple syrup or honey
1/2 c oat flour (ground from oats in coffee grinder or blender or food processor)
1 c whole grain oats such as Coaches Oats (or 1/2 c unsweetened coconut flakes AND 1/2 c oats)
1/4 c each: walnuts or pecans (chopped); raisins or other dried fruit, and/or dark chocolate chips


Preheat oven to 350˚F. 

In small bowl, combine flax seed & water; let sit while you're preparing the batter. 

Combine wet ingredients in a large bowl & dry ingredients in another bowl.  Add flax eggs to wet ingredients then stir in dry ingredients.

Drop cookies by spoonfuls on lightly greased baking sheet or silpat non-stick baking mat set on top of a cookie sheet (the cookies won’t expand much). Bake 15-17 min or til cookies are slightly golden brown.

Remove from oven and let cool on baking sheet a few minutes before transferring to cooling rack. After completely cooled, store in air-tight container to keep fresh for a few days. Refrigerate or freeze for even longer storage time.


recipe adapted from Minimalist Baker


You might also like these healthy breakfast options


Cottage Cheese Pancakes {GF}


What are your favorite quick and easy "Go To"  breakfast options?


Monday, April 7, 2014

Healthy Tips and Recipes for Families from Ellen Briggs of Family Food Experts & Kid Critics #WorldHealthDay


As a mom of 4 I know all about picky eaters! I totally get the time, effort, dedication and enormous amount of patience it takes to get kids to eat a variety of healthy foodsWhile I sometimes "sneak" healthy foods into our meals I much prefer to have fruits and vegetables openly visible on our plates so that my children can recognize them and eventually, hopefully have a better appreciation and knowledge about what healthy foods are. We are trying to raise health minded adults after all. 


So when I was contacted by Ellen Briggs, founder of Family Food Experts and author of several books geared towards families eating and being healthy I was excited to share some of the fun ideas and great tips with all of you. For instance, we all know that smell has a lot to do with how we perceive and even taste foods but did you know that you can easily remove the strong odors that many sulfuric veggies naturally have? 

How to REDUCE NASTY SULFUR SMELLS: Do your kids run away every time you cook broccoli, cauliflower, cabbage or brussel sprouts? Reduce their offensive odors by adding a piece of stale bread or 2 celery stalks in the cooking water. 

I'm loving all of the really simple recipes, tips and games on the Family Food Experts and Kid Critics website, I hope you will add them to your reading list!


Here are 5 tips inspired by the Fuel Your DreamsTM program to help families with small children to choose and eat healthier foods. 


Teach your kids about the connection between what they eat and drink and what happens inside their bodies. Once they learn that 100 billion neurons in their brain send thousands of messages so they can run fast, they are totally motivated to eat avocados and sweet potatoes so they can be the best they can be.  Kids will eat healthy foods that taste good.

Don’t make broccoli a 4-letter word.  Find ways to include fruits and vegetables in creative and varied ways, and your kids will love to experiment and add it to their menu.

Be transparent with your kids – they’re too smart.  Rather than hiding, pureeing, masking vegetables, if you prepare and present them properly, kids will embrace vegetables and create healthy, lifelong habits.

You become what you eat and drink.  However, kids need a reason to eat healthy food beyond “your mom said so.”  So, for example, if a kid wants to be an NFL football player (a popular choice among boys) or a veterinarian (the number one pick among girls surveyed), educate them on what specific foods can “fuel their body for success.”

Don’t “dumb it down.”  Kids are critical thinkers (love to ask and understand the “why”); they love to vote (power); and they appreciate being heard. Further, kids are egocentric, focused primarily on their own desires. Once kids understand WHY nutrition fuels success, they will crave it.


The Family Food ExpertsTM team is dedicated to providing healthier food solutions that kids love to eat so they can become the best they can be.  The team developed the Kid Kritics ApprovedTMSeal as a way to make food purchasing and meal preparation easier for families by identifying foods that are “kid approved” that also pass firm ingredient standards.  

Fuel Your DreamsTM uses a variety of educational and online tools to motivate kids to want to eat healthier so they can optimize their potential, and empowers parents to understand that kids will eat healthy foods as long as they taste good.


Founder Ellen Briggs authored “Are Your Kids Running on Empty?” and “Mom, I’m Hungry.  What’s for Dinner?”  Briggs hosts the "Family Food Experts TM Kitchen" radio show, and along with co-host Carolina Lima Jantac, MS, RD, LD, and Manager of Healthier Recipe Moms, hosts “Better Food Choices,” both found on iHeartRadio.  Briggshas been featured on Fox and Friends and on NBC, CBS, PBS, FOX, and more. 


Some of my favorite recipes that get kids to eat their veggies:


Bubble and Squeak has yummy brussel sprouts, potatoes and cheese, yum!


Roasted Butternut Squash Tacos with South Western Black Beans are one of my kids favorite dinners.


Almost Meatless Sloppy Joe's


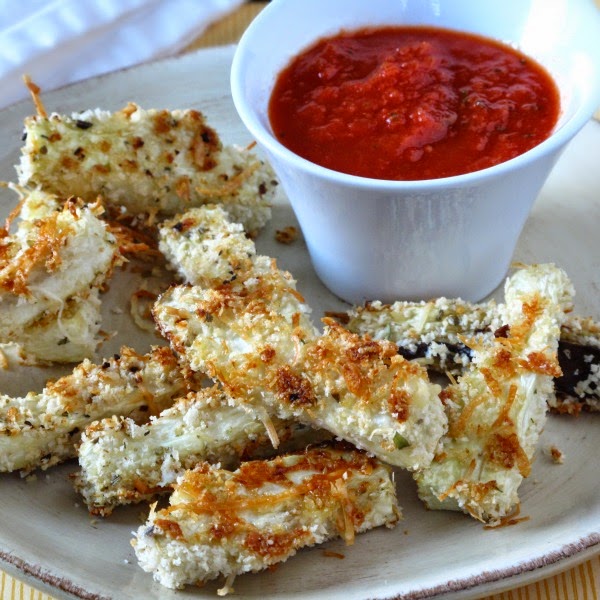
Baked Parmesan Eggplant Dippers


Share your tips and tricks on getting kids to eat healthier.

What is your child's favorite veggie? 

How do you incorporate veggies into your family's diet?


Friday, February 21, 2014

How To Make Kombucha Step by Step {Recipe Redux} #fermentation


I've been hearing about kombucha for a while now and how amazing it tastes and how good it is for you. I recently got on board the kombucha train and am thrilled to report it is every bit as yummy as I've heard! A friend of mine from work gave me a "SCOBY baby" and my first impression was "ewww" it does look a bit like a little slimy sea creature." After I got over my slight aversion to the little slime ball I set out to brew my first batch of kombucha tea and now, I have several batches going in circulation.


A quick description of what kombucha is all about:

While sugar is needed for the fermentation process, the bacteria and yeast from the SCOBY burn out most of the sugar in the tea, transforming into a  fizzy, sweet and sour fermented drink. I think it tastes quite a bit like a cross between champagne and a not too sweet apple cider. Weird huh?

"SCOBY" is an acronym for "symbiotic culture of bacteria and yeast." Which is responsible for turning plain old tea into a healthy probiotic drink, Kombucha.


Probiotics are essential to basic human nutrition. Probiotics are live microorganisms (in most cases, bacteria) that are similar to the beneficial microorganisms naturally found in the human gut. These “good bacteria” are used to prevent and alleviate many different conditions, but particularly those that affect the gastrointestinal tract. 


So you want to try to brew some Kombucha on your own? Awesome! Here's a simple step by step list to get you going. I must say, I was a bit nervous I would mess it up and it would taste awful, I've heard some people say it tasted like vinegar, but it was one of the easiest things I've ever done and tasted wonderfully refreshing!


1. Get your hands on a SCOBY. I asked around and was surprise when a friend of mine from work had been making Kombucha for years and brought me one of her "babies".  I recently saw a brewing kit sold on Williams Sonoma from a company called  Brooklyn Kombucha.  Cultures of Health sells Kombucha starter kits although their SCOBY's are dehydrated which is sketchy in my opinion and some people, including my uncle who has been brewing Kombucha for years had trouble getting them to activate.  SCOBYS are fairly sensitive so I recommend asking around to find a friend who has one. Just be sure to have them send the SCOBY home in a glass jar, covered in at least a half cup of Kombucha tea. (It’s important the SCOBY does not dry out and the tea is useful for making your first batch.)
2. Brew a batch of tea with 2 tea bags or 1 1/2 teaspoons loose, preferably black or green tea with 2 1/2 cups filtered water. Do not bring water to a full boil. Remove water from heat, pour into a sterilized quart sized glass jar. Add 1/4 cup sugar, stir to dissolve. Add tea bags. Place a clean washcloth or cheese cloth. Avoid teas that contain oils, like earl grey or flavored teas. Let the tea cool to room temperature! You can remove the tea bags/leaves after 10 minutes or when it comes to room temperature about 4 hours later. The heat can destroy the live organisms in the SCOBY.  
3.  Pour the starter tea that came with your SCOBY into your freshly brewed tea and stir with a wooden or plastic spoon, NO METAL. Using a wooden or plastic spoon, or your hands clean and rinsed with vinegar, add SCOBY to the glass jar. Cover with cheesecloth and secure with a rubber band.  
4.  Store the jar in a safe place, preferably between 70F-80F (your pantry should be fine, keep it out of direct sunlight) with good air circulation and not near any other fermenting foods or drinks. 
5. Let it sit unbothered for 7-10 days. On day 7 taste the Kombucha and see if it is sweet enough. It should be sweet and fizzy. 


6. To keep the cycle going (that's a good thing!) Make 2 new batches of tea following above directions.  
7. With clean hands, also rinsed in vinegar to remove any bacteria place the new SCOBY onto a plate rinsed in vinegar. During the fermentation period, the baby SCOBY grows and creates another thin layer, the new baby. Usually they stay together, floating at the top of the jar and you need to gently peel them apart. Sometimes the baby will float to the bottom, that's o.k. too. It depends on the type of tea, container and conditions it's in. 


8. Measure 1/2 cup from your brewed Kombucha and stir in into your freshly brewed, cooled tea. Separate your new tea into 2, quart size glass jars. Place the 2 SCOBYS, mother and baby one into each of the 2 containers of cooled tea. 
 9. Either drink the remainder of the finished Kombucha or store in an airtight container in the refrigerator which will stop the fermentation process. If you want to add berries, fresh fruit or fresh ginger {ginger ale!} do so now and either place in the fridge or if you want it to get fizzier keep in the pantry. Just remember if you add anything to the Kombucha and keep it in the pantry you will need to add a few more tablespoons of sugar or it will become vinegary.


photo source


Day 7. Can you see the mother and baby starting to separate? 


Important Tips:

No metal! My friend and mom even suggest removing your rings when you handle the SCOBY.

Rinse your hands in vinegar before handling. Any germs on your skin will multiply like crazy during the fermentation process. 

You can make bigger batches if you want, one SCOBY will ferment any size container. 

Finished Kobucha will keep in the refrigerator for around a month. 

SCOBY's will last a very long time if handled with care. If it becomes dark and discolored or looks icky, toss it.


Thursday, January 30, 2014

Healthy Almond and Oat Thumbprint Cookies with Apricot Preserves


Disclaimer: The following post will leave you with an emergency cookie craving condition that can only be cured by immediately making Apricot Thumbprint cookies and devouring 3 or 4 with a big glass of cold milk.


These little cookies are the perfect solution for sudden sweet tooth emergencies. With a very short ingredient list of pantry staples you can have these naturally sweetened cookies in your hot little hands in minutes. What?!! Mom made cookies!!! and the "HIP HIP HOORAY'S" continued for minutes while the little darlings danced around and hugged each other.

note to self, make cookies more often for the poor children.


I made these cookies as part of a fun little project I'm putting together so check back soon for that! They will be incorporated into a make shift Mediterranean noshing platter that would be perfect to serve for a "girls night in" or any little gathering of friends and family.


Just a handful of healthy ingredients go into these cute little cookies. Making them a better-for-you thumbprint cookie than the typical shortbread variety.
plus a bit of walnut oil, not pictured


If you own a blender or food processor, making you own "Almond Meal" is super easy and tons cheaper than store bought! I use Raw almonds that I've soaked in water previously, dried and store in an airtight container. Soaking almonds removes the naturally occurring phytic acid in the nuts which block the minerals from absorbing in your body.

Throw the almonds in your food processor or heavy duty blender like a Vitamix and pulse for 20-30 seconds till you have a floury substance. Don't over mix or you'll get almond paste.


Instead of using wheat or white flour in your cookies try using oat flour. Again, it only takes 20 seconds to blend up your own flour and it will save you a ton of money. Make big batches ahead of time and store in an air tight container for future use. I love Coach's Oats for the toasted, cracked flavor and the whole grain goodness.


Mix it all up, form into walnut size balls and use your thumb to make room for the jam! 
You know the drill.


Enjoy!


recipe adapted from Whole Foods Market


YIELDS   18-20 COOKIES        TIME 20 MINUTES

Ingredients

1 cup blanched, unsalted, raw almonds or pecans

1 cup Whole rolled oats (I use Coach's Oats)
1/2 cup gluten free flour mix or unbleached, white whole wheat flour 
2 tablespoons flax meal (optional, adds Omega 3's a healthy fat)
1/2 cup expeller-pressed canola oil or Coconut oil
1/2 cup honey or maple syrup 
1/4 teaspoon fine sea salt
6 tablespoons naturally sweetened Apricot Preserves


Preheat oven to 350°F. Put almonds and oats into a food processor and pulse until coarsely ground, about 20 seconds. Transfer to a large bowl and add flour, oil, syrup and salt. Stir to combine well. Roll walnut-sized balls of the dough in the palm of your hand to form each cookie. Place a sheet of parchment on a large cookie sheet and arrange balls 2 inches apart. Press your thumb gently down into the center of each cookie to make an indentation. Spoon a small teaspoon of jam into each indentation. 


Bake cookies until golden brown and just firm around the edges, 15 to 20 minutes. Transfer to a rack to let cool completely, then serve immediately or store between layers of waxed paper in an airtight container.


notes/substitutions

Sunflower or pumpkin seeds can be subbed for those with nut allergies.

Whole grain oats such as Coach's Oats or steel cut are a healthier option than over processed quick oats which have been processed usually with the bran stripped from it's original state and pre-cooked all before it gets to you.

You can try subbing 1/2 of the oil for applesauce but the cookie may flatten out a bit and will have a more cake like texture.  

Maple syrup is 'wetter' than honey so if you use honey your mixture will be a bit crumblier.


Monday, December 30, 2013

South Western Soft Tacos with Roasted Butternut Squash {12 Weeks of Winter Squash}


These vegetarian soft tacos are stuffed with the flavors of the South West and are just the thing to warm up your tummies on cold winter nights. They are full of good for you veggies and beans to get you back on track after all of the Holiday feasts and treats.


Winding down from all of the Christmas craziness festivities and celebrations means that me and my honey get to chill in the evenings for a few days and enjoy watching the kids play with their gifts. Relaxing for me means simple dinners that will warm and comfort us through the Winter Break so we can and hang out afterwards and play with our new games and snuggle up to watch our new movies.


 I'm a little glad that Christmas is over so we can just relax and spend time together for a couple of weeks before we get on with our normal routines. Don't get me wrong, I love Christmas but all of the running around and the sweets overload had to stop! Everyone was strung out on chocolate and candy canes and hopped up on egg nog for a solid month it seemed. With 4 kids there was a party every single day for a week and a half and family parties and get togethers every night.

Blessed. We are truly blessed. That's truly how I feel…… when I wasn't not exhausted from running from school to school with specified goodies, from store to store with requested side dishes to share and from city to city for gathering after gathering of our ginormous extended family.

Blessed.


Boring tacos just won't do during the winter Holiday season. Winter squash is in abundance after all and I fully intend on getting the most out of it until mid February when we are all sick of it and looking forward to the early spring harvest here in the Sonoran desert.


Of all the winter squashes out there, butternut squash is probably my fav. It's the most creamy, sweet and flavorful of the squashes IMHO and requires little to no added ingredients to be just perfect. Simple, natural, delicious. It's name says it all, butternut. That's pretty much what it tastes like a la mode, buttery and nutty. It is also very versatile. Roast it with some apple cider and cinnamon and you have a sweet side dish to your pork. Add chili powder, paprika and caramelized onions and you have a spicy side for your roast chicken. Blend it up with a bit of cream, spices and garlic, BAM my favorite hot and creamy comfort soup.


Last but not least, it makes a perfect vegetarian 'filler' for burritos or tacos. I'm not a big meat eater at all and much prefer hearty, healthy veggies instead.  Not only is it healthier and cheaper to sub veggies for meat as much as possible but very convenient. I pick up a few squash, sweet potatoes and sturdy greens at the store and when I'm looking for a last minute weeknight dinner I go to my  pantry and grab a squash, some beans, an onion and have a casserole, burritos or these tacos on the table in no time.


SERVES     6          TIME    30 MINUTES
Ingredients 
6-8 whole grain soft taco size tortillas 
1 cup (or 1 can) black beans, rinsed and cooked 
1 teaspoon cumin 
1 teaspoon chili powder 
1 teaspoon smoked paprika 
1 teaspoon salt, divided

1 teaspoon olive oil 
1 small butternut squash 
1 small red bell pepper, seeded and sliced into thin strips 
1 cup grated pepper jack cheese 
Arugula (or baby spinach) 
Avocado, sliced 
Roasted or Chipotle Salsa (my fav's, use your fav)
1 small handful cilantro, chopped


Preheat oven to 400F 

Peel and cube the squash, lightly toss with oil, sprinkle with salt, paprika and chili powder and roast at 400F on a stone baking sheet for 20 minutes till done but firm.  Read my post with step by step photos and tips for cutting and preparing squash here.
In a small sauce pot over medium-low heat cook beans with cumin and salt for 15-20 minutes till warmed through. 
Place tortilla on plate, layer with cheese, squash, beans, arugula, cilantro and avocado. Spoon on roasted salsa.


This is my post for week numero 9 of #12 Weeks of Winter Squash hosted by my peeps Heather and Joanna. Got some yummy winter squash recipes to share? It's not too late to join!


HAPPY HAPPY HOLIDAYS! I HOPE YOU AND YOUR FAMILY ARE TOGETHER AND YOUR LIFE IS FILLED WITH BLESSINGS!


Sunday, December 8, 2013

Pumpkin Egg Nog Custard {Using Monk Fruit in the Raw}


“I received free samples from Cumberland Packing Corp., maker of Monk Fruit In The Raw. By posting this recipe I am entering a recipe contest sponsoredby Cumberland Packing Corp. and am eligible to win prizes associated with the contest. I was not compensated for my time.”


My sweet tooth is very snobby.  Any plain ol' cookie or cake just doesn't cut it. In fact, believe it or not, I could live quite happily without said cookies or cakes in my life, well, mostly. Which is why every single Christmas I go through a very serious internal battle with myself over the whole Holiday baking thing. Not only do I have a slightly snobby sweet tooth but I've never really liked to bake cookies, cakes or anything involving flour, measuring and decorating. There I said it. Please don't hate me. 


Really, I think that it is mostly because, IMHO baking goodies involves a lot of precision and dedication to the written recipe and I don't do well with exact measurements…... or following directions. Rather, I like to think of my kitchen as a laboratory where I can change up any recipe to my own liking, an experiment if you will. 


Creating a delicious dish that never existed before, all on your own is my idea of pure satisfaction.


This months Recipe Redux Challenge was to replace table sugar in a baked goodie with Monk Fruit in the Raw. Since cookies and cakes weren't in the cards for me I really had to think on this one. Finishing off a once a year Holiday meal with an individual serving of custard sounds about right to me. The pumpkin is not overwhelming in this custard nor is it too sweet thanks to the sugar replacement.


The flavors are all mild yet decadent and the thick, creamy bourbony custard sets on your tongue just long enough for you to relax and enjoy the moment.


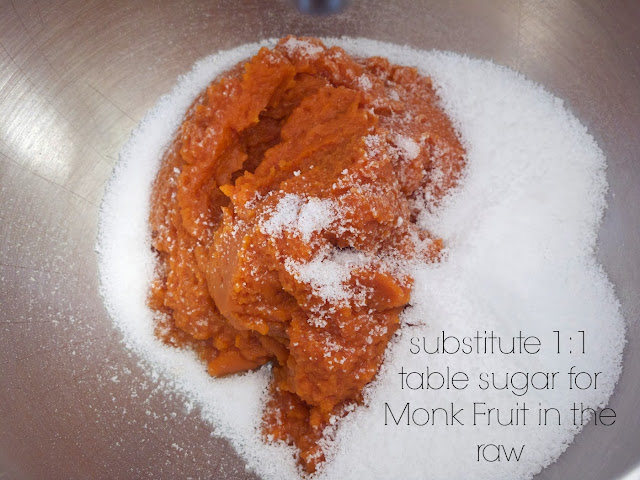
Replacing Monk Fruit in the Raw for table sugar cuts the calories significantly. It's the best sugar substitute I've come across and has zero calories.


As I mentioned above, patience is not exactly one of my virtues. This part takes patience. Pour the pumpkin mixture into the cheesecloth lined sieve and strain over a deep bowl. The mixture is thick so it very slowly drains. I used a spatula to coax the mixture through. Don't smash the mixture though, that will defeat the purpose of straining it. You want the liquids to strain through, not the bulk. 


So, what is Monk Fruit in the Raw?  

It's an all natural sweetener made from vine-ripened monk fruit, also called luo han guo, it has zero-calories and tastes just like sugar. Originally harvested in the 13th century, it’s been making life more delicious for years now. You substitute Monk Fruit in the Raw equally for table sugar. 


Where can you find it? It's a very new product so unless you live on the East coast you will probably have to order it on line. If you do, please help support Simply Healthy Family by ordering it from our Amazon store here.


The flavors of egg nog where used in this custard, not actual egg nog since custards are already egg based. I used a bourbon, vanilla extract which I highly suggest you get your hands on some and thick and creamy condensed milk. Nutmeg and cinnamon make this custard a delicious Holiday treat.


  • PREP TIME    20 MINUTES      BAKE TIME    50-70 MINUTES      YIELDS    4

  • You will need:

  • 1 cup canned pumpkin
  • 1/3 cup Monk Fruit in the Raw
  • 1 tablespoon butter, melted 
  • 1 1/2 teaspoons bourbon vanilla extract
  • large egg yolks 
  • large egg 
  • 1 cup half-and-half 
  • 1/2 teaspoon salt
  • 1 teaspoon ground cinnamon
  • 1/2 teaspoon ground nutmeg
  • (12-ounce) can fat-free evaporated milk 
  • Crushed ginger snap cookies for topping (which I of course forgot to picture.)


  1. 1. Preheat oven to 325°.
  2. 2.  In the bowl of a mixer, place pumpkin, 1/3 cup Monk Fruit in the Raw and next 4 ingredients (through whole egg) On medium speed, beat until well blended. 
  3. 3. Place half-and-half and next 4 ingredients (through milk) in a saucepan over medium heat. Heat to 180° or until tiny bubbles form around edge, stirring occasionally. Add milk mixture to pumpkin mixture. Beat at low speed 1 minute. Strain mixture through a cheesecloth-lined sieve into a bowl. Discard solids. Divide mixture evenly among 4 (4-ounce) ramekins. Place ramekins in a large roasting pan. Add hot water to pan to a depth of 1 inch; bake at 325° for 50-70 minutes or until center barely moves when pan is touched. Remove ramekins from pan; cool on a wire rack. Cover and chill 4 hours.
Sprinkle crushed ginger snaps over top and dollop with whipped cream if desired.